源码编译前需先装好 libxext、glew、glm 依赖;自定义着色器要自己创建 ~/.config/slop 目录并放入 .frag/.vert 文件;它只负责选区,截图或录屏还得另配 import、maim 或 ffmpeg
slop
naelstrof更新放缓命令行选区工具,让用户在屏幕上框选一块区域,把坐标输出到标准输出,常配合截图或录屏工具使用。
slop (Select Operation) is an application that queries for a selection from the user and prints the region to stdout.
v7.7发布于 2025-06-28 21:50 UTC937star62fork同步于 2026-11-07 07:33 UTC
git clone https://github.com/naelstrof/slop.git
cd slop
cmake -DCMAKE_INSTALL_PREFIX="/usr" ./
make && sudo make install 硬件要求按 README 说明
README 未说明具体硬件要求;依赖 libxext、glew、glm,并尽可能使用 OpenGL 加速,属于 X11 桌面工具
X11 下的区域选择工具,把用户框选的坐标和窗口信息打印到 stdout,方便脚本接截图或录屏
命令行选区工具,让用户在屏幕上框选一块区域,把坐标输出到标准输出,常配合截图或录屏工具使用。
核心能力
- 鼠标悬停窗口即显示选择框,点击返回窗口尺寸和 ID
- 用 -f 自定义输出格式,直接拼进 ffmpeg 或 import 命令
- 支持设置边框粗细、内边距、颜色和透明度
- 可用 --shader 链式加载 GLSL 后处理着色器
- 按住空格键可移动已开始的选择区域
容易踩的坑
内容由模型根据 README 生成,可能不完整或不准确,以官方文档为准。看原文 README
- v7.7最新正式版2025-06-28 · 2025-06-28 21:50 UTC
- Fixed glew not linking correctly in CMake.
- Rectangle drawing now syncs with display rather than waiting 10 ms arbitrarily.
- Can now build with C++17
- v7.62018-04-23 · 2018-04-23 07:56 UTC
这个版本没有写更新说明。
- v6.3.48Slop now respects _NET_FRAME_EXTENTS2017-07-29 · 2017-07-29 21:51 UTC
查看更新说明
Slop now no longer selects shadows around windows in Mutter (the Gnome window manager). Gone is the annoying arbitrary padding around Gnome windows.
- v6.3.47GLEW is back, Nvidia preload segfault is eliminated.2017-07-20 · 2017-07-20 02:18 UTC
查看更新说明
Turns out linking to pthreads fixed the issue of slop segfaulting during loading. I re-added GLEW to dependencies because I realized including a custom OpenGL loader actually increases space taken, provided you use GLEW anyway.
- v6.3.38Switched to a POSIX compliant argument parser.2017-05-24 · 2017-05-24 02:06 UTC
查看更新说明
This will break everyone's scripts who use shorthand like
slop -b100, there should be a space between the-band the100now.
用户点评
登录用户的真实使用记录,可按版本和硬件筛选共 0 条
还没有人点评。第一个说出真实体验的人最有价值。
slop
slop (Select Operation) is an application that queries for a selection from the user and prints the region to stdout.
Features
- Hovering over a window will cause a selection rectangle to appear over it.
- Clicking on a window makes slop return the dimensions of the window, and it's ID.
- OpenGL accelerated graphics where possible.
- Supports simple arguments:
- Change selection rectangle border size.
- Select X display.
- Set padding size.
- Force window, or pixel selections with the tolerance flag.
- Set the color of the selection rectangles to match your theme! (Even supports transparency!)
- Remove window decorations from selections.
- Supports custom programmable shaders.
- Move started selection by holding down the space bar.
Practical Applications
slop can be used to create a video recording script in only three lines of code.
#!/bin/bash
slop=$(slop -f "%x %y %w %h %g %i") || exit 1
read -r X Y W H G ID <<< $slop
ffmpeg -f x11grab -s "$W"x"$H" -i :0.0+$X,$Y -f alsa -i pulse ~/myfile.webm
You can also take images using imagemagick like so:
#!/bin/bash
slop=$(slop -f "%g") || exit 1
read -r G <<< $slop
import -window root -crop $G ~/myimage.png
Furthermore, if you are adventurous, you can create a simple script to copy things from an image itself, unselectable pdf, or just VERY quick rectangular selection or for places where there is no columnar selection (very useful for dataoperators)
You need to have tesseract with support for the specific language, xclip and others are nice if you just want them in clipboard.
#!/bin/env bash

imagefile="/tmp/sloppy.$RANDOM.png"
text="/tmp/translation"
echo "$imagefile"
slop=$(slop -f "%g") || exit 1
read -r G <<< $slop
import -window root -crop $G $imagefile
tesseract $imagefile $text 2>/dev/null
cat $text".txt" | xclip -selection c
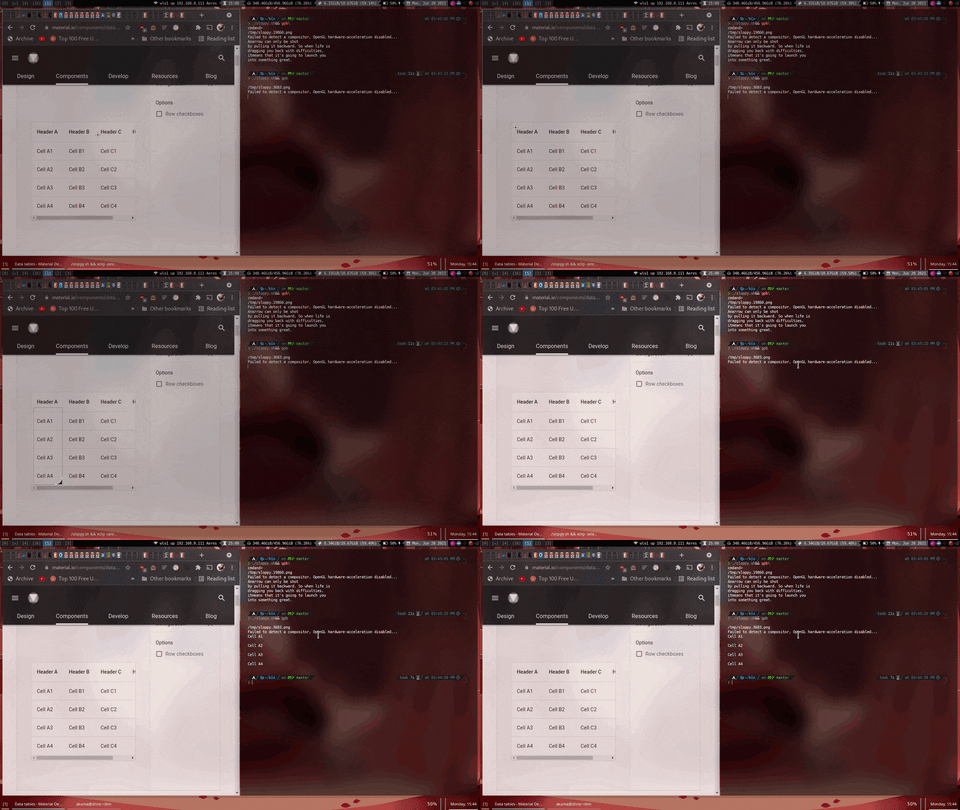
If you don't like ImageMagick's import: Check out maim for a better screenshot utility.
Lets see some action
Ok. Here's a comparison between 'scrot -s's selection and slop's:


You can see scrot leaves garbage lines over the things you're trying to screenshot! While slop not only looks nicer, it's impossible for it to end up in screenshots or recordings because it waits for DestroyNotify events before completely shutting down. Only after the window is completely destroyed can anything take a screenshot.
how to install
Install using your Package Manager (Preferred)
- Arch Linux: extra/slop
- Void Linux: slop
- FreeBSD: x11/slop
- NetBSD: x11/slop
- OpenBSD: graphics/slop
- Gentoo: x11-misc/slop
- NixOS: slop
- GNU Guix: slop
- Debian: slop
- Ubuntu: slop
- Fedora: slop
- Red Hat Enterprise Linux (via EPEL): slop
- CentOS Stream and similar (via EPEL): slop
- Ravenports: slop
- Alpine Linux: community/slop
- Please make a package for slop on your favorite system, and make a pull request to add it to this list.
Install using CMake (Requires CMake)
Note: Dependencies should be installed first: libxext, glew, and glm.
git clone https://github.com/naelstrof/slop.git
cd slop
cmake -DCMAKE_INSTALL_PREFIX="/usr" ./
make && sudo make install
Shaders
Slop allows for chained post-processing shaders. Shaders are written in a language called GLSL, and have access to the following data from slop:
| GLSL Name | Data Type | Bound to |
|---|---|---|
| mouse | vec2 | The mouse position on the screen. |
| desktop | sampler2D | An upside-down snapshot of the desktop, this doesn't update as the screen changes. |
| texture | sampler2D | The current pixel values of slop's frame buffer. Usually just contains the selection rectangle. |
| screenSize | vec2 | The dimensions of the screen, where the x value is the width. |
| position | vec2 attribute | This contains the vertex data for the rectangle. Only contains (0,0), (1,0), (1,1), and (0,1). |
| uv | vec2 attribute | Same as the position, this contians the UV information of each vertex. |
The desktop texture is upside-down because flipping it would cost valuable time.
Shaders must be placed in your ${XDG_CONFIG_HOME}/slop directory, where XDG_CONFIG_HOME is typically ~/.config/. This folder won't exist unless you make it yourself.
Shaders are loaded from the --shader flag in slop. They are delimited by commas, and rendered in order from left to right. This way you can combine multiple shaders for interesting effects! For example, slop -rblur1,wiggle would load ~/.config/slop/blur1{.frag,.vert} and ~/.config/slop/wiggle{.frag,.vert}. Then render the selection rectangle twice, each time accumulating the changes from the different shaders.
Enough chatting about it though, here's some example shaders you can copy from shaderexamples to ~/.config/slop to try out!
The files listed to the right of the | are the required files for the command to the left to work correctly.
slop -r blur1,blur2 -b 100|~/.config/slop/{blur1,blur2}{.frag,.vert}

slop -r wiggle -b 10|~/.config/slop/wiggle{.frag,.vert}

And all together now...
slop -r blur1,blur2,wiggle -b 50 -c 1,1,1|~/.config/slop/{blur1,blur2,wiggle}{.frag,.vert}

Finally here's an example of a magnifying glass.
slop -r crosshair|~/.config/slop/crosshair{.frag,.vert}
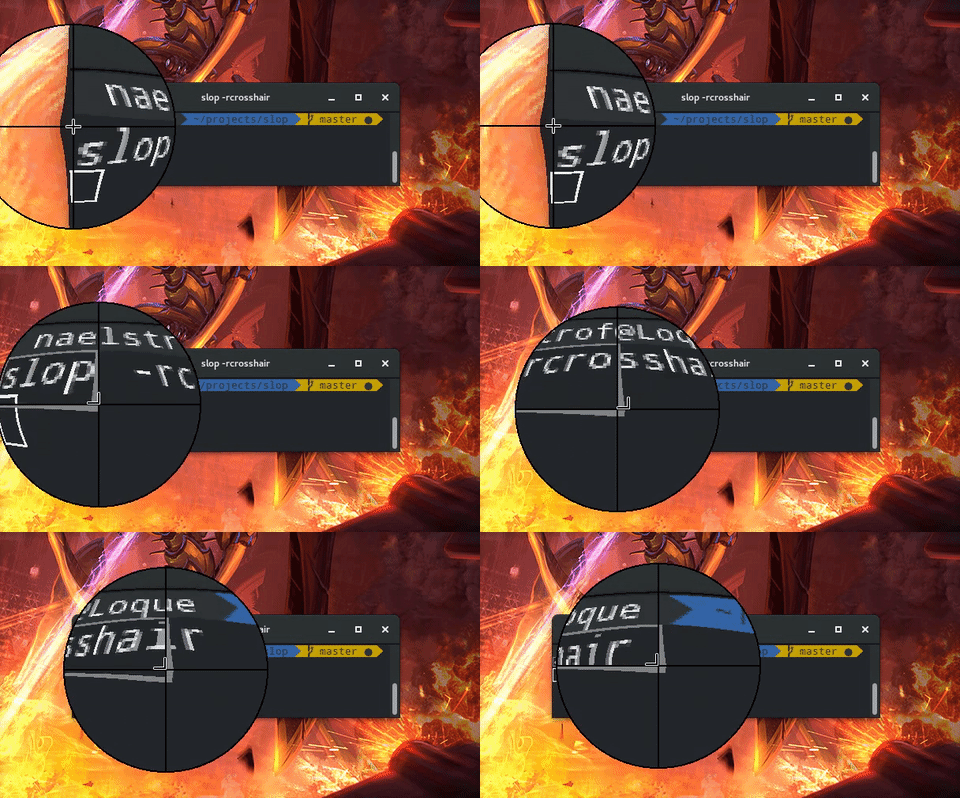
It's fairly easy to adjust how the shaders work by editing them with your favourite text editor. Or even make your own!