Linux 无 NVIDIA GPU 时需先装 CPU 版 PyTorch,默认 wheel 捆绑 CUDA;下载数据和日志需额外装 pip install -e ".[train]";项目存在两套配置系统,legacy 脚本用 config/config.py,其余阶段用 configs/ 下 JSON。

train-llm-from-scratch
FareedKhan-devMIT活跃维护从下载数据到生成文本,手把手教你从零训练自己的大语言模型,适合想搞懂 LLM 训练全流程的开发者动手实践。
A straightforward method for training your LLM, from downloading data to generating text.
暂无版本13,185star +26 / 7 天1,831fork同步于 2026-11-10 17:27 UTC
git clone https://github.com/FareedKhan-dev/train-llm-from-scratch.git
cd train-llm-from-scratch
pip install -e . 硬件要求按 README 说明
无 GPU 也能跑:笔记本 CPU 约十分钟可训练 369K 参数小模型;13M 模型用免费 Colab/Kaggle T4 即可。README 给出 A100 40GB、V100 16GB、RTX 4090/3090/4080/4060 等显存与可训练规模对照,A100 约可训 6B~8B。
需要 CUDA
从零手写 PyTorch Transformer,带你走完预训练到对齐的完整 LLM 训练流程
从下载数据到生成文本,手把手教你从零训练自己的大语言模型,适合想搞懂 LLM 训练全流程的开发者动手实践。
核心能力
- 纯 PyTorch 手写 Transformer,不依赖 transformers、trl、peft
- 提供现代架构实现:RoPE、RMSNorm、SwiGLU、GQA/MLA、MoE、KV cache
- 手写 SFT、奖励模型、PPO、DPO、GRPO 等后训练算法
- 自带字节级 BPE 分词器与 top-k/top-p/min-p 采样、投机解码、int8
- 含 Streamlit 控制面板与各阶段 smoke 配置,便于快速验证
容易踩的坑
内容由模型根据 README 生成,可能不完整或不准确,以官方文档为准。看原文 README
暂无 release 数据(可能没有发版,或尚未同步)。
用户点评
登录用户的真实使用记录,可按版本和硬件筛选共 0 条
还没有人点评。第一个说出真实体验的人最有价值。
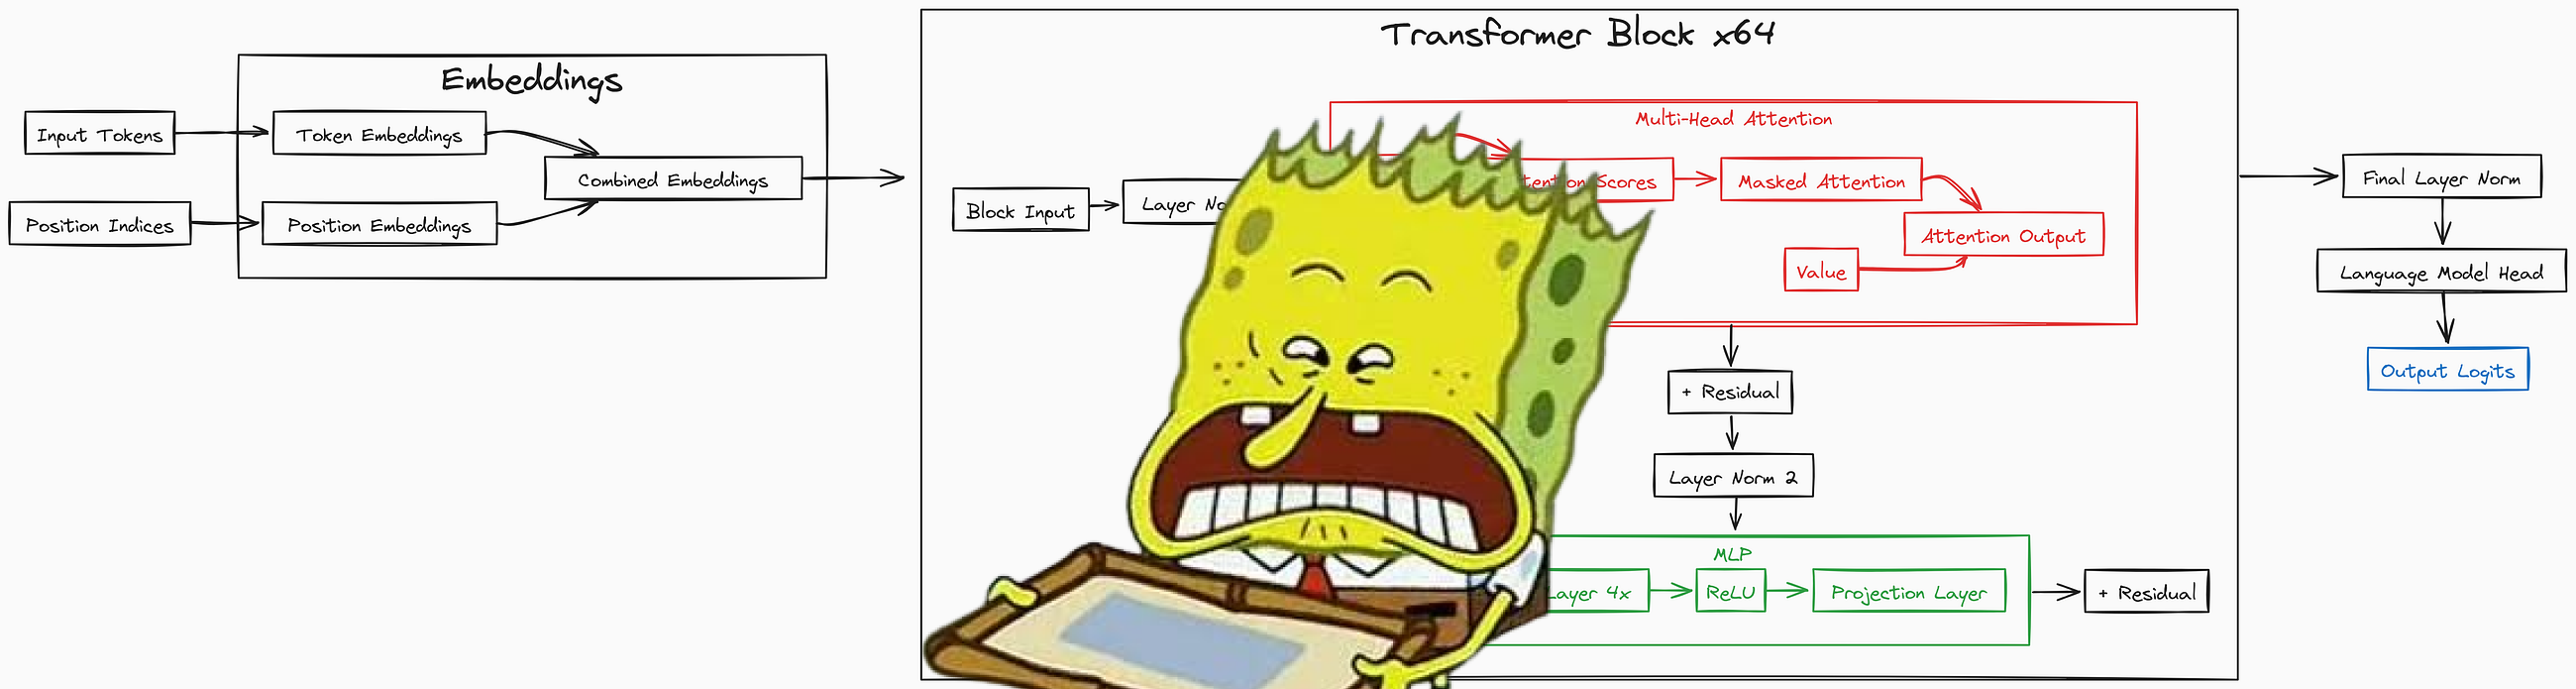
Train LLM From Scratch




I am Looking for a PhD position in AI. GitHub
I implemented a transformer model from scratch using PyTorch, based on the paper Attention is All You Need. You can use my scripts to train your own billion or million parameter LLM using a single GPU, or a small one on a laptop CPU with no GPU at all.
This started as a pretraining tutorial. It now goes all the way from raw text to an aligned, reasoning style model, with every algorithm hand written in plain PyTorch (no trl, no peft, no transformers). The whole journey is one idea repeated: turn text into numbers, predict the next token, then keep changing the data and the loss until the model does what we want.
Next to the original model there is now a modern one, built the way current open models are (rotary positions, RMSNorm, SwiGLU, grouped-query and latent attention, Mixture of Experts, a KV cache), and every stage can train either. The newer training tricks are here too, each written out by hand: the Muon optimizer, LoRA, IPO and SimPO, Dr. GRPO, DAPO and GSPO, speculative decoding and int8 weights.

Here is the path we will walk, end to end:
raw text  ->  tokens  ->  a Transformer  ->  next-token loss  ->  a base model
base model  ->  SFT  ->  Reward Model  ->  {PPO, DPO}  ->  GRPO  ->  evaluation and chat
Below is the output of a trained 13 million parameter LLM, just so you can see where the small end of this starts:
In ***1978, The park was returned to the factory-plate that
the public share to the lower of the electronic fence that
follow from the Station's cities. The Canal of ancient Western
nations were confined to the city spot. The villages were directly
linked to cities in China that revolt that the US budget and in
Odambinais is uncertain and fortune established in rural areas.
Table of Contents
- Who this is for
- Prerequisites and Training Time
- Setup
- No GPU? Train on Your Laptop
- Code Structure
- Step 1: Preparing the Data
- Step 2: The Model, Built From Small Pieces
- Step 3: Pretraining the Base Model
- Step 4: Generating Text
- Step 5: Post-Training, Turning a Base Model Into an Assistant
- Step 6: Evaluation
- Step 7: Talking to the Model
- The Streamlit Control Panel
- The Documentation Site
- Run the Whole Thing
- Type Safety and Tests
- What's Next
Who this is for
I tried to write this so one page works for very different readers:
- If you are a student, read top to bottom. Every block of code comes after a plain explanation of what it does and why, and most blocks are followed by the output you should expect.
- If you are a developer, the commands and file paths are all here. You can copy, run, and read the referenced source files directly.
- If you are a researcher, the post-training half is the interesting part: SFT, a Bradley-Terry reward model, PPO with GAE, DPO/ORPO/KTO, and GRPO, all from scratch on the same small Transformer, trained on real public datasets.
Every diagram in this README is colored the same way, so the colors mean something:
- green is raw data
- teal is stored, tokenized data on disk
- blue is a plain processing step
- yellow is the model or a training step
- orange is the reinforcement learning and reward parts
- red is a loss
- grey is a saved checkpoint
- purple is the final output or evaluation
Prerequisites and Training Time
You need a basic understanding of object oriented programming, neural networks, and PyTorch. Below are some resources to help you get started:
| Topic | Video Link |
|---|---|
| OOP | OOP Video |
| Neural Network | Neural Network Video |
| Pytorch | Pytorch Video |
You do not need a GPU to start: the laptop track trains a small model on a CPU in minutes. For the bigger models you will need a GPU. A free Colab or Kaggle T4 is enough for the 13 million parameter model, but it will not fit a billion parameter model. Here is a rough guide:
| GPU Name | Memory | 2B LLM Training | 13M LLM Training | Max Practical LLM Size (Training) |
|---|---|---|---|---|
| NVIDIA A100 | 40 GB | ✔ | ✔ | ~6B to 8B |
| NVIDIA V100 | 16 GB | ✘ | ✔ | ~2B |
| NVIDIA RTX 4090 | 24 GB | ✔ | ✔ | ~4B |
| NVIDIA RTX 5090 | 32 GB | ✔ | ✔ | 13M verified, larger configs TBD |
| NVIDIA RTX 3090 | 24 GB | ✔ | ✔ | ~3.5B to 4B |
| NVIDIA RTX 4080 | 16 GB | ✘ | ✔ | ~2B |
| NVIDIA RTX 4060 | 8 GB | ✘ | ✔ | ~1B |
| Tesla T4 | 16 GB | ✘ | ✔ | ~1.5B to 2B |
If a large config runs out of memory, the pretraining script has opt-in flags (--amp, --grad-checkpointing, --grad-accum) that bring the memory down a lot. More on those later.
Setup
Clone the repository and install it in editable mode. The editable install puts config, src, data_loader, and ui on your import path, so you do not need to set PYTHONPATH by hand anymore:
git clone https://github.com/FareedKhan-dev/train-llm-from-scratch.git
cd train-llm-from-scratch
pip install -e .
If you use uv, uv sync does the same and also installs the test tools. On a Linux machine without an NVIDIA GPU, install the small CPU build of PyTorch first (pip install torch --index-url https://download.pytorch.org/whl/cpu), because the default Linux wheel bundles CUDA.
There are optional extras for the parts you want:
pip install -e ".[train]"   # datasets + wandb, for downloading data and logging
pip install -e ".[ui]"      # streamlit + pandas + altair, for the control panel
pip install -e ".[docs]"    # mkdocs, for the documentation site
pip install -e ".[all]"     # everything
There are two config systems, and it helps to know which is which from the start:
config/config.pyis the original, simple config for the legacy pretraining scriptscripts/train_transformer.py. It is plain Python constants.config/post_training_config.pyplus the JSON files inconfigs/drive everything else (pretraining the bigger base, SFT, reward, DPO, PPO, GRPO). You edit a small JSON file per stage, and any field can also be overridden on the command line, for example--lr 2e-5 --batch_size 16.
For fast checks there is a tiny configs/smoke/ variant of every stage that shrinks the model so a full run finishes in seconds on a CPU or a single GPU.
No GPU? Train on Your Laptop
You can train a real (small) language model on a laptop CPU, from raw text to generated stories, in about ten minutes. Three commands:
python scripts/prepare_tiny_data.py                              # TinyStories + a BPE tokenizer trained from scratch
python scripts/train_transformer.py --preset tiny --arch modern  # 369K parameters, about 5 minutes on a CPU
python scripts/generate_text.py --model_path models/tiny.pt      # write a story
The first command downloads 25 MB of TinyStories (short stories written for training tiny models) and trains a 4,096 token BPE tokenizer on it, written from scratch in src/tokenizer/bpe.py. A small vocabulary keeps the embedding table small, which is what makes a tiny model fast. Here is what the tiny model wrote after five minutes of training on my laptop:
#### OUTPUT ####
Once upon a time, there was a little girl named Lily. She liked to eat some food together.
One day, Lily found a big box in a box. She wanted to pick it up and find it. She thought it
would make it happy. She looked at her bear and said, "Yes, I will find me. I want to help you get it."
Real words, real sentences, a character and a plot of sorts, from 369 thousand parameters. Bigger presets (student, small) take longer and write better stories. scripts/benchmark.py measures how fast each preset trains on your machine before you commit to a long run, and scripts/model_report.py tells you how big a model is, how much compute it needs, and whether it fits in memory.
The full guide, with the presets, the expected losses and experiments to try, is in docs/student.
Code Structure
train-llm-from-scratch/
├── src/
│   ├── models/                  # the Transformer, built from small pieces
│   │   ├── mlp.py               # the feed-forward block
│   │   ├── attention.py         # single head and multi head attention
│   │   ├── transformer_block.py # one block: attention + MLP + residuals
│   │   ├── transformer.py       # the full model: embeddings + blocks + lm_head
│   │   ├── modern/              # the modern decoder: RoPE, RMSNorm, SwiGLU, GQA/MLA, MoE, KV cache
│   │   ├── factory.py           # build_model(cfg): classic or modern from one config
│   │   └── lora.py              # LoRA adapters, from scratch
│   ├── optim/                   # Muon, and cosine / WSD / linear learning-rate schedules
│   ├── tokenizer/               # a byte-level BPE tokenizer, from scratch
│   ├── inference/               # sampling (top-k, top-p, min-p), speculative decoding, int8
│   ├── post_training/           # SFT, reward model, PPO, DPO, GRPO, eval, inference
│   ├── checkpoint.py            # saving and loading checkpoints from any wrapper
│   └── device.py                # picks CUDA, Apple MPS, CPU (or an experimental TPU)
├── config/
│   ├── config.py                # legacy pretraining config (plain constants)
│   ├── presets.py               # named model sizes: tiny, student, small, 13m, 77m, 3b
│   ├── post_training_config.py  # typed dataclasses for every post-training stage
│   └── loader.py                # merges defaults < base.json < stage.json < CLI, checks types
├── configs/                     # editable JSON, one file per stage (+ smoke/)
├── data_loader/                 # batch iterators for each kind of data
├── scripts/                     # every runnable step lives here
├── tests/                       # pytest: models, losses, configs, and every script end to end
├── ui/                          # the Streamlit control panel
├── docs/                        # the MkDocs site (theory + diagrams)
├── images/                      # the diagrams in this README (+ the generator)
└── pyproject.toml               # pip install -e .
Step 1: Preparing the Data
A model only ever sees integers. So the first job is always the same: take text, turn it into token ids, and store those ids on disk in a format that is fast to read during training. We do this four times, once for each kind of training we will do later.

The four streams are:
- Pretraining text from The Pile, stored as a flat array of token ids in an HDF5 file.
- Instruction data (Alpaca, Dolly, GSM8K) for SFT, packed into fixed length rows with a mask that says which tokens are the assistant's answer.
- Preference pairs (Anthropic HH-RLHF, UltraFeedback) for the reward model and DPO, stored as
{prompt, chosen, rejected}. - RL prompts (GSM8K and a small arithmetic warm-up) for PPO and GRPO, stored as
{prompt, gold}.
Tokenization
We use the r50k_base tokenizer from OpenAI's tiktoken, the same one GPT-3 used. Text becomes a list of integers, and we append a special <|endoftext|> token (id 50256) at the end of every document so the model learns where one piece of text stops and the next begins. (The laptop track trains its own, much smaller tokenizer instead; BPE from scratch shows how.)

For the legacy path, download a slice of The Pile and tokenize it into HDF5:
python scripts/data_download.py            # downloads the validation file + 1 training shard
python scripts/data_preprocess.py          # tokenizes to data/train/pile_train.h5 and data/val/pile_dev.h5
The newer, faster path streams and batch-encodes the same data straight into a flat token array:
python scripts/prepare_pretrain_data.py --split val   --out data/pile_dev.h5
python scripts/prepare_pretrain_data.py --split train --num_shards 1 --out data/pile_train.h5
Once tokenized, the data is just a long line of integers. Here is a real peek at the validation file I prepared for this README (8.76 million tokens), the first ten ids, and what they decode back to:
#### OUTPUT ####
dtype: int32 | shape: (8762951,) | total tokens: 8762951
first 10 token ids: [18610, 286, 3993, 3081, 319, 4088, 11, 4640, 2163, 11]
decoded back to text:
'Effect of sleep quality on memory, executive function, and language
 performance in patients with refractory focal epilepsy ...'
That is the whole idea of tokenization in one output: text in, a flat array of integers out, and the integers decode straight back to the original words.
The chat format and loss mask
For everything after pretraining the model has to know who is talking. The r50k_base tokenizer has only one special token, so instead of inventing new ones we use plain text role markers that the model simply learns during SFT. A single turn looks like this (see src/post_training/chat_template.py):
<|user|>
{user content}<|endoftext|><|assistant|>
{assistant content}<|endoftext|>
For math and reasoning we ask the assistant to show its work in a fixed structure, because the reinforcement learning reward later checks the number inside the answer tags:
<think>step by step reasoning ...</think><answer>42</answer>
The important trick is the loss mask. When we encode a conversation we also build a 0/1 mask that is 1 only on the assistant tokens (and the <|endoftext|> that ends the turn). That way SFT trains the model to write answers, not to parrot the prompt back. Here is the exact code that builds the ids and the aligned mask:
def encode_chat(messages, add_generation_prompt=False):
    ids, mask = [], []
    for m in messages:
        role = m["role"]
        # Role header is always masked out (we never train the model to emit it).
        header_ids = _encode_ordinary(_header_for(role))
        ids.extend(header_ids)
        mask.extend([0] * len(header_ids))

        content_ids = _encode_ordinary(m["content"])
        is_completion = role == "assistant"
        ids.extend(content_ids)
        mask.extend([1 if is_completion else 0] * len(content_ids))   # train on assistant only

        ids.append(EOT_ID)                                            # turn terminator
        mask.append(1 if is_completion else 0)                        # learn to stop
    return ids, mask
Here is a real rendered conversation and the verifier reward in action, printed from this repo:
#### OUTPUT ####
rendered chat:
<|user|>
What is 13 + 29?<|endoftext|><|assistant|>
<think>13 + 29 = 42</think><answer>42</answer><|endoftext|>

extract_answer("<answer>42</answer>")        -> 42.0
reward_gsm8k("<answer>42</answer>", 42.0)    -> 1.2    # correct AND well formatted
reward_gsm8k("<answer>7</answer>",  42.0)    -> 0.2    # wrong, but it used the format
And here is one real packed SFT row, showing how only the assistant tokens are trained (the mask is 1 on 48 of the 512 tokens in this row):
#### OUTPUT ####
tokens shape: (2131, 512) | loss_mask shape: (2131, 512)
row 0: trained (mask=1) tokens = 48 / 512
row 0 decoded:
  <|user|>
  What is the world's oldest annual marathon based on the reference text below? ...
  <|assistant|>
  The Boston Marathon is the world's oldest annual marathon, beginning on April 19th 1897.
The data prep scripts for these stages are:
python scripts/prepare_sft_data.py          # Alpaca + Dolly + GSM8K  -> sft_packed.h5
python scripts/prepare_preference_data.py   # HH-RLHF + UltraFeedback -> preferences.jsonl
python scripts/prepare_rl_prompts.py        # GSM8K + arithmetic      -> rl_prompts.jsonl
Step 2: The Model, Built From Small Pieces
A Transformer looks scary as one block of code, so we build it from four small pieces and then stack them. Each piece is a tiny nn.Module. We start at the bottom.
Multi Layer Perceptron (MLP)
The MLP is the part of each block that does the per-token "thinking". It takes each token vector, expands it to four times its size, applies a ReLU, and squeezes it back down. The expansion gives the layer room to mix features before projecting back.

class MLP(nn.Module):
    """A simple Multi-Layer Perceptron with one hidden layer."""
    def __init__(self, n_embed):
        super().__init__()
        self.hidden = nn.Linear(n_embed, 4 * n_embed)   # expand to 4x
        self.relu = nn.ReLU()                           # non-linearity
        self.proj = nn.Linear(4 * n_embed, n_embed)     # project back down

    def forward(self, x):
        x = self.relu(self.hidden(x))
        x = self.proj(x)
        return x
The __init__ sets up the two linear layers and the activation. The forward runs them in order. Input and output shapes are the same, (B, T, n_embed), so blocks can be stacked without any reshaping. The code is in src/models/mlp.py.
Single Head Attention
Attention is the part that lets a token look at other tokens. Each head builds three views of the input: a query (what am I looking for), a key (what do I contain), and a value (what I will pass on if chosen). We score every query against every key, scale the scores, hide the future with a causal mask, turn the scores into weights with a softmax, and take a weighted sum of the values.

class Head(nn.Module):
    """A single attention head with causal masking."""
    def __init__(self, head_size, n_embed, context_length):
        super().__init__()
        self.key   = nn.Linear(n_embed, head_size, bias=False)
        self.query = nn.Linear(n_embed, head_size, bias=False)
        self.value = nn.Linear(n_embed, head_size, bias=False)
        # a lower-triangular matrix used to mask out future positions (rebuilt on load, never saved)
        self.register_buffer('tril', torch.tril(torch.ones(context_length, context_length)), persistent=False)

    def forward(self, x):
        B, T, C = x.shape
        k = self.key(x)
        q = self.query(x)
        scale_factor = 1 / math.sqrt(k.size(-1))                       # 1 / sqrt(head_size)
        attn_weights = q @ k.transpose(-2, -1) * scale_factor          # (B, T, T) scores
        attn_weights = attn_weights.masked_fill(self.tril[:T, :T] == 0, float('-inf'))  # no peeking ahead
        attn_weights = F.softmax(attn_weights, dim=-1)
        v = self.value(x)
        out = attn_weights @ v                                         # weighted sum of values
        return out
The causal mask is what makes this a language model: position t can only attend to positions 0..t, never to the future it is trying to predict. The code is in src/models/attention.py.
Multi Head Attention
One head learns one kind of relationship. We want many, running in parallel, so the model can track several patterns at once (for example, a pronoun and the noun it refers to). We run n_head heads, concatenate their outputs, and pass the result through one more linear layer.

class MultiHeadAttention(nn.Module):
    def __init__(self, n_head, n_embed, context_length):
        super().__init__()
        self.heads = nn.ModuleList(
            [Head(n_embed // n_head, n_embed, context_length) for _ in range(n_head)]
        )
        self.proj = nn.Linear(n_embed, n_embed)   # mixes the heads back together

    def forward(self, x):
        x = torch.cat([h(x) for h in self.heads], dim=-1)   # concat along the feature dim
        x = self.proj(x)
        return x
Each head works in a smaller subspace of size n_embed // n_head, so the concatenation lands right back at n_embed. The final projection lets the heads talk to each other.
The Transformer Block
Now we combine attention and the MLP into one block. The block uses pre-norm residual connections: we normalize, run a sub-layer, and add the result back to the input. The "add back" (the residual) is what lets gradients flow through a deep stack without vanishing.

class Block(nn.Module):
    def __init__(self, n_head, n_embed, context_length):
        super().__init__()
        self.ln1 = nn.LayerNorm(n_embed)
        self.attn = MultiHeadAttention(n_head, n_embed, context_length)
        self.ln2 = nn.LayerNorm(n_embed)
        self.mlp = MLP(n_embed)

    def forward(self, x):
        x = x + self.attn(self.ln1(x))   # attention sub-layer + residual
        x = x + self.mlp(self.ln2(x))    # MLP sub-layer + residual
        return x
Read x = x + self.attn(self.ln1(x)) as "look at the other tokens, then add what you learned back onto yourself". The MLP line is the same idea for the per-token thinking. The code is in src/models/transformer_block.py.
The Full Transformer
Finally we wrap everything. Token ids become vectors through an embedding table, we add a position embedding so the model knows token order, we run the stack of blocks, normalize one last time, and project to vocabulary-sized scores called logits. If we pass targets, the model also returns the cross-entropy loss.

class Transformer(nn.Module):
    def __init__(self, n_head, n_embed, context_length, vocab_size, N_BLOCKS):
        super().__init__()
        self.token_embed = nn.Embedding(vocab_size, n_embed)
        self.position_embed = nn.Embedding(context_length, n_embed)
        self.attn_blocks = nn.ModuleList(
            [Block(n_head, n_embed, context_length) for _ in range(N_BLOCKS)]
        )
        self.layer_norm = nn.LayerNorm(n_embed)
        self.lm_head = nn.Linear(n_embed, vocab_size)
        self.register_buffer('pos_idxs', torch.arange(context_length))

    def forward(self, idx, targets=None):
        x = self.forward_hidden(idx)        # token + position embeddings, then the blocks + final norm
        logits = self.lm_head(x)            # (B, T, vocab_size)
        loss = None
        if targets is not None:
            B, T, C = logits.shape
            # reshape (not view): the target slice is not contiguous, so .view() fails on CPU
            flat_logits = logits.reshape(B * T, C)
            targets = targets.reshape(B * T).long()
            loss = F.cross_entropy(flat_logits, targets)
        return logits, loss
One small detail worth pointing out: we use .reshape and not .view on the targets. The target batch is a non-contiguous slice of the data, and .view refuses to work on that on CPU. .reshape handles both cases and is identical in every other way. The full model, including forward_hidden (which the reward and value heads reuse later) and generate, lives in src/models/transformer.py.
When we build the model it prints its parameter count. Here are the three sizes used in this repo:
#### OUTPUT ####
13M small config (n_embed=128, n_head=8, n_blocks=1):      13,142,656 params
this tutorial's base (n_embed=512, n_head=8, n_blocks=8):  77,031,552 params
post-training default (n_embed=1024, n_head=16, n_blocks=24): 406,359,168 params
The Modern Version of the Same Model
The model above is the 2017 design in its GPT-2 form, and it is the best one to learn from. Every big open model released since 2023 (Llama, Qwen, Gemma, Mistral, DeepSeek) keeps the same skeleton, a stack of pre-norm residual blocks with attention and an MLP, but swaps almost every part inside the block. src/models/modern/ implements those swaps, one small file per idea:
| Part | This README's model | The modern model |
|---|---|---|
| Positions | a learned table added to the embeddings | rotary embeddings (RoPE) inside attention |
| Normalization | LayerNorm | RMSNorm |
| MLP | ReLU | SwiGLU |
| Keys and values | one per query head | shared by groups of heads (GQA), or a small latent (MLA) |
| Attention | written out by hand | F.scaled_dot_product_attention (FlashAttention on GPUs) |
| Generation | re-runs the whole text for every token | a KV cache: each new token runs alone |
| MLP size | dense | optional Mixture of Experts |
Every script takes --arch modern (or "arch": "modern" in the JSON configs), so the whole pipeline, from pretraining to GRPO, can train either one. On the laptop preset, the modern model reaches a dev loss of 2.78 against 3.30 for the classic one, with 42% fewer parameters. The modern model docs explain each change with the math, the code and the reason it was made.
Step 3: Pretraining the Base Model
Pretraining is the long pole. We read random windows of tokens, ask the model to predict the next token at every position, measure how wrong it was with cross-entropy, and nudge the weights. We repeat that a few thousand times.

The simplest version is the original scripts/train_transformer.py, which reads config/config.py and trains on one GPU. To train the 13 million parameter model, set these values in config/config.py:
VOCAB_SIZE = 50304
CONTEXT_LENGTH = 128
N_EMBED = 128
N_HEAD = 8
N_BLOCKS = 1
then run:
python scripts/train_transformer.py
Or skip the editing and use a named preset. The presets are in config/presets.py, from tiny (a laptop) to 3b (the original default):
python scripts/train_transformer.py --preset 13m
python scripts/train_transformer.py --preset 77m --arch modern
For long runs you can save periodic checkpoints and resume after an interruption:
python scripts/train_transformer.py --checkpoint-every 1000 --keep-last 3
python scripts/train_transformer.py --resume latest
If a bigger config does not fit in memory, turn on the opt-in memory savers (all off by default, so default behavior never changes):
python scripts/train_transformer.py --amp --grad-checkpointing --grad-accum 8
The bigger, modern path is scripts/pretrain_base.py. It is the same recipe with the things you need to train a mid-size base: DistributedDataParallel across GPUs, bf16 autocast, gradient accumulation, a cosine learning-rate schedule with warmup, and periodic checkpoints. One GPU or many, same command shape:
# one GPU
python scripts/pretrain_base.py
# both GPUs
torchrun --standalone --nproc_per_node=2 scripts/pretrain_base.py
# the modern model, with the Muon optimizer and a warmup-stable-decay schedule
python scripts/pretrain_base.py --arch modern --optimizer muon --lr_schedule wsd
Muon updates each weight matrix along the nearest orthogonal matrix of its momentum, computed with five Newton-Schulz iterations instead of an SVD. The WSD schedule keeps the learning rate flat and decays it only at the end, so any checkpoint from the flat part can be finished later.
The core of the loop is small. Each step pulls a batch, runs the forward pass under bf16, scales the loss for gradient accumulation, backpropagates, clips the gradient, and steps the optimizer:
for micro in range(cfg.grad_accum):
    xb, yb = next(batch_iter)
    with amp_autocast(cfg.amp_dtype, ctx.device):
        _, loss = model(xb, yb)
        loss = loss / cfg.grad_accum       # so the accumulated gradient is the full-batch mean
    loss.backward()
torch.nn.utils.clip_grad_norm_(model.parameters(), cfg.grad_clip)
optimizer.step()
While it trains it prints the step, the loss, the learning rate, and the throughput, and at eval time it also prints the dev loss and peak GPU memory:
#### OUTPUT ####
Model parameters: 77,031,552 (~77M) | world_size=2
Effective batch = 24*4*2 = 192 seqs/step
step 0    | loss 11.1393 | lr 7.50e-06 | 0 tok/s
step 20   | loss 8.6159  | lr 1.57e-04 | 148,936 tok/s
step 100  | loss 6.3108  | lr 6.00e-04 | 150,609 tok/s
  [eval] step 100  | train 6.2501 | dev 6.1745
step 500  | loss 4.5317  | lr 5.39e-04 | 137,334 tok/s
  [eval] step 500  | train 4.7066 | dev 4.6499
step 1000 | loss 4.0100  | lr 3.48e-04 | 131,348 tok/s
  [eval] step 1000 | train 4.1200 | dev 4.1419
step 1500 | loss 3.6483  | lr 1.45e-04 | 123,781 tok/s
  [eval] step 1500 | train 3.8393 | dev 3.8985
step 1900 | loss 3.7725  | lr 6.36e-05 | 151,488 tok/s
  [eval] step 1900 | train 3.7345 | dev 3.7607
Done. Final checkpoint -> models/base_pretrained.pt
The loss curve
Here is the real training and dev loss for the 77 million parameter base I trained for this README on 2x L40 GPUs. The loss starts near ln(vocab_size), which is about 10.8 (the loss of a model that guesses uniformly), and drops as the model learns the statistics of the text:

This run started at a loss of 11.14 (just above the uniform-guess line at ln(50304) = 10.83) and came down to about 3.73 train / 3.76 dev after 2000 steps, training at roughly 130,000 to 150,000 tokens per second across the two L40s. The curve going down is the whole story of pretraining: the model is slowly compressing the patterns of language into its weights.
Step 4: Generating Text
A trained model predicts a distribution over the next token. To generate, we sample one token from that distribution, append it, and feed the longer sequence back in. We repeat until we have enough tokens.
def generate(self, idx, max_new_tokens):
    for _ in range(max_new_tokens):
        idx_cond = idx[:, -self.context_length:]    # never look back further than the context window
        logits, _ = self(idx_cond)
        logits = logits[:, -1, :]                   # only the last position matters for the next token
        probs = F.softmax(logits, dim=-1)
        idx_next = torch.multinomial(probs, num_samples=1)
        idx = torch.cat((idx, idx_next), dim=1)
    return idx
Run it from a saved checkpoint:
python scripts/generate_text.py --model_path models/transformer_B.pt --input_text "The" --max_new_tokens 100
The real generate also takes a temperature and top-k, top-p and min-p filters (--temperature, --top_k, --top_p, --min_p), and stays inside the window the model was trained on. Two more tricks are one flag away:
# speculative decoding: a small draft model guesses 4 tokens, the big model checks them in one pass
python scripts/generate_text.py --model_path models/student.pt --draft_model models/tiny.pt
# int8 weights: the linear layers take a quarter of the memory
python scripts/generate_text.py --model_path models/student.pt --int8
Speculative decoding gives exactly the big model's output distribution, however bad the draft is; a good draft just means fewer passes of the big model. The inference docs prove it in three lines and measure both tricks.
The 13 million parameter model already produces real words and roughly correct grammar, which is the encouraging part of starting small.
Step 5: Post-Training, Turning a Base Model Into an Assistant
A base model can continue text, but it cannot follow instructions or reason on purpose. That takes post-training. The good news is that the model never changes. We reuse the exact same Transformer backbone and only change two things at each stage: the data, and the loss.
The one design idea that makes all of this fit in a small repo is wrap, do not rewrite. The educational Transformer gains a single extra method, forward_hidden, which returns the hidden states right before lm_head. The reward head, the value head, and all the log-probability math compose around that one method. Nothing in src/models/ had to be rewritten.
SFT (Supervised Fine-Tuning)
SFT teaches the base model to answer in the chat format. It is still next-token prediction, with one change: the loss is only counted on the assistant tokens, using the mask we built back in Step 1.

def sft_loss(logits, tokens, loss_mask):
    logits = logits[:, :-1, :]        # predict token t+1 from position t
    targets = tokens[:, 1:]
    mask = loss_mask[:, 1:].to(logits.dtype)

    V = logits.size(-1)
    ce = F.cross_entropy(logits.reshape(-1, V).float(), targets.reshape(-1).long(), reduction="none")
    ce = ce.view(targets.shape) * mask          # zero out the prompt positions
    return ce.sum() / mask.sum().clamp(min=1.0) # average over assistant tokens only
Prepare the data and train:
python scripts/prepare_sft_data.py --context_length 1024
torchrun --standalone --nproc_per_node=2 scripts/train_sft.py
The loss code is in src/post_training/sft.py, the trainer in scripts/train_sft.py. To fine-tune only small low-rank adapters instead of every weight, add --lora_rank 16 (LoRA, written from scratch in src/models/lora.py); the adapters are merged back when the checkpoint is saved.
The Reward Model
To do reinforcement learning we need a number that says how good an answer is. One way to get it is to train a reward model on human preference pairs. We put a small linear head on top of the SFT backbone that reads one scalar off the last real token, and we train it with the Bradley-Terry loss so the chosen answer always scores higher than the rejected one.

def bradley_terry_loss(chosen_rewards, rejected_rewards):
    """Mean -log sigmoid(chosen - rejected) over a batch of preference pairs."""
    return -F.logsigmoid(chosen_rewards - rejected_rewards).mean()
python scripts/prepare_preference_data.py --source both
torchrun --standalone --nproc_per_node=2 scripts/train_reward.py
The headline metric is preference accuracy, the fraction of held-out pairs where the model scores the chosen answer higher. In this run on 7974 real preference pairs it reached 0.574 (above the 0.5 chance line); with a larger model and more data this climbs toward 0.65 to 0.75.
#### OUTPUT ####
Reward model from sft.pt | 7974 pairs | total_steps=996
  [eval] step 250 | test_acc 0.539 | margin 0.006
  [eval] step 750 | test_acc 0.576 | margin 0.063
Done RM. test_acc 0.574 margin 0.063 -> reward.pt
The code is in src/post_training/reward_model.py and src/post_training/reward_train.py.
DPO, ORPO and KTO
DPO skips the reward model and the RL loop entirely. It works directly on preference pairs by comparing how much more likely the policy makes the chosen answer (relative to a frozen reference copy of the SFT model) than the rejected one.

def dpo_loss(policy_chosen_logps, policy_rejected_logps,
             ref_chosen_logps, ref_rejected_logps, beta=0.1):
    pi_logratios = policy_chosen_logps - policy_rejected_logps
    ref_logratios = ref_chosen_logps - ref_rejected_logps
    logits = pi_logratios - ref_logratios
    loss = -F.logsigmoid(beta * logits).mean()
    return loss, ...
torchrun --standalone --nproc_per_node=2 scripts/train_dpo.py --loss_type dpo
#   --loss_type orpo   reference free, folds SFT and alignment into one stage
#   --loss_type kto    works from an unpaired desirable / undesirable signal
In this run, DPO reached an implicit-reward accuracy of 0.574 on the held-out pairs (the fraction where the policy prefers the chosen response more than the frozen reference does). The same flag also selects IPO (ipo), SimPO (simpo, no reference model) and conservative DPO for noisy labels (--label_smoothing 0.1). All of them are in src/post_training/dpo.py, and this page compares them.
PPO
PPO is the classic RLHF loop. For each prompt the model writes an answer (a rollout), we score it (with the reward model or with a GSM8K answer checker), add a small per-token penalty for drifting away from the reference model, estimate how good each token was with GAE, and take a few clipped gradient steps.

The two load-bearing pieces, the advantage estimate and the clipped policy loss, are short:
def ppo_policy_loss(new_logp, old_logp, advantages, mask, clip=0.2):
    ratio = torch.exp(new_logp - old_logp)
    surr1 = ratio * advantages
    surr2 = torch.clamp(ratio, 1.0 - clip, 1.0 + clip) * advantages   # the clip keeps the step small
    loss = -masked_mean(torch.min(surr1, surr2), mask)
    return loss, ...
python scripts/prepare_rl_prompts.py
torchrun --standalone --nproc_per_node=2 scripts/train_ppo.py --reward_source verifier
#   --reward_source rm   to use the trained reward model instead of the answer checker
The actor-critic shares the backbone through a small value head (src/post_training/value_head.py), and the GAE, clipped policy loss, and clipped value loss are in src/post_training/ppo.py.
GRPO / RLVR
GRPO is the 2025, DeepSeek-R1 style method. It throws away the value network. For each prompt it samples a whole group of answers, scores them with a verifiable reward (did the final number match the gold answer), and uses the group's own mean and standard deviation as the baseline. The advantage of an answer is just how much better it did than its group.

def group_advantages(rewards, group_size, eps=1e-4):
    r = rewards.view(-1, group_size)
    mean = r.mean(dim=1, keepdim=True)
    std = r.std(dim=1, keepdim=True)
    adv = (r - mean) / (std + eps)     # how much better than the rest of my group
    return adv.reshape(-1)
torchrun --standalone --nproc_per_node=2 scripts/train_grpo.py --group_size 8
A short arithmetic curriculum runs first, so the model gets some non-zero reward to learn from before it faces full GSM8K. The group-relative advantage, the clipped surrogate, and the k3 KL penalty are in src/post_training/grpo.py.
In 2025 several groups found small biases in GRPO's details, and each fix is a flag on the same trainer:
python scripts/train_grpo.py --adv_norm none --loss_agg seq-mean-token-sum-norm   # Dr. GRPO
python scripts/train_grpo.py --clip_high 0.28 --filter_groups true --kl_coef 0    # DAPO
python scripts/train_grpo.py --ratio_level sequence --clip 0.0003 --clip_high 0.0004   # GSPO
RL for reasoning explains what each one changes and why.
Step 6: Evaluation
The single number that ties all the stages together is greedy GSM8K accuracy. We give the model a math question, let it generate, pull the number out of the <answer> tags, and check it against the gold answer.

for s in base_pretrained sft dpo ppo grpo; do
  python scripts/eval_post_training.py --ckpt models/$s.pt --label $s --limit 200 --append logs/table.jsonl
done
python scripts/eval_post_training.py --table logs/table.jsonl
This builds the headline comparison so you can track every stage on one axis, Base, SFT, DPO, PPO, and GRPO, all with the same greedy decoding and the same verifiable reward: parse the number inside the <answer> tags and check it against the gold answer. The same command runs on any checkpoint, so you fill in the table for your own run, and the bigger the base model and the more pretraining compute you give it, the higher these scores go.
What changes after SFT
The clearest effect of SFT is a change in behavior. The base model only knows how to continue text, so when you give it a question it just writes more text. After SFT the model has learned the chat format: it answers inside the <think>...</think><answer>...</answer> structure it was trained on, which is exactly the structure the reward model and the RL stages then optimize against. That learned format is the foundation every stage after it builds on. You can talk to any stage's checkpoint with scripts/chat.py and watch this directly, which is the next section.
Step 7: Talking to the Model
scripts/chat.py loads any checkpoint, reads the model dimensions from the checkpoint itself, and lets you talk to it. It applies the chat template for instruction models, or treats the base model as raw continuation.

# instruction-tuned models
python scripts/chat.py --ckpt models/sft.pt --prompt "What is 13 + 29?"
python scripts/chat.py --ckpt models/grpo.pt --prompt "..." --greedy
# base model, raw continuation
python scripts/chat.py --ckpt models/base_pretrained.pt --raw --prompt "Once upon a time"
# interactive, no --prompt
python scripts/chat.py --ckpt models/sft.pt
Generation reuses the same tested core as training and eval, so what you see in chat is exactly what the RL stages optimized. Sampling is controlled by --temperature, --top_p, --top_k, or --greedy. The code is in src/post_training/inference.py.
The Streamlit Control Panel
If you would rather click than type, there is a small control panel that can launch every stage, watch the loss live, run evaluation, and chat with a checkpoint:
pip install -e ".[ui]"
streamlit run ui/app.py
It has one page per stage (Data, Pretrain, SFT, Reward, DPO, PPO, GRPO, Evaluate, Chat), each one a form over the same JSON configs you would edit by hand.
The Documentation Site
Every stage has a deeper write-up, with the theory, the diagram, the real code, and what each metric means, on the documentation site:
https://fareedkhan-dev.github.io/train-llm-from-scratch/
To run it locally:
pip install -e ".[docs]"
mkdocs serve
There is also a Foundations section that explains the ideas this code assumes you know (tokenization, the decoder-only Transformer, attention, objectives, optimization, generation, and how to estimate a model's size, compute and memory), a Modern LLM section for everything that changed since the original Transformer, and the laptop track.
Run the Whole Thing
Once the base is pretrained and the data is prepared, one script runs the entire post-training chain and prints the across-stages table:
bash scripts/run_posttraining.sh            # uses both GPUs via torchrun
NPROC=1 bash scripts/run_posttraining.sh    # single GPU
For a fast end-to-end check on a tiny model that finishes in seconds, every stage has a smoke config:
python tests/test_post_training_smoke.py                          # core math, on CPU
python scripts/train_sft.py --config configs/smoke/sft.json       # a real (tiny) training run
Type Safety and Tests
Most bugs in training code do not crash. A misspelled config key quietly keeps its default, and a tensor with one extra dimension broadcasts into a bigger one and gives a slightly wrong loss. So the repo checks three things:
-
Configs are typed. Every stage config is a dataclass with real types, and the loader checks every value from the JSON files and the command line. A typo stops the run with a hint:
train_dpo.py: error: my.json: unknown key 'betta' for DPOConfig (did you mean 'beta'?) -
Tensor shapes are part of the types. Functions say what they take, for example
Float[Tensor, "batch seq vocab"](jaxtyping), and the tests check every call at runtime. -
mypy and ruff run in CI, along with the tests on Linux, Windows and macOS. One test trains every stage, pretraining to GRPO, for a few steps on generated data.
uv sync            # or: pip install -e . pytest beartype ruff mypy
uv run pytest      # about 170 tests; add -m "not slow" to skip the end-to-end run
uv run mypy
uv run ruff check .
The type safety guide shows a real bug the shape checks catch and plain PyTorch does not, and CONTRIBUTING.md explains how to add code that keeps these checks green.
What's Next
I recommend you start small. With no GPU, train the tiny preset on your laptop and watch it write its first stories. With a GPU, train the 13 million parameter model, see it produce sensible words, then scale n_embed and n_blocks up with the memory flags until you hit your GPU limit. Then try --arch modern on the same data and compare the curves. After that, walk the post-training chain one stage at a time and watch the GSM8K number move. Every stage is small enough to read in one sitting, and they all share the same model.
What changed in each release, and who contributed it, is in CHANGELOG.md.
If you want to go deeper on any single stage, the documentation site has a focused page for each one.
Wanna chat on something? My Linkedin
Star History

transformers
huggingface·Python
统一加载和运行文本、视觉、音频、多模态的预训练模型,覆盖推理与训练,省去为每个模型重写代码的麻烦。
预训练模型+4训练框架
168737+12535kv5.22.22026-11-10 17:05 UTC
LlamaFactory
hiyouga·Python
一套统一接口搞定 100+ 大语言模型和多模态模型的微调,支持 LoRA 等高效训练方式,省去为每个模型单独写训练脚本的麻烦。
微调框架+4训练框架
75977+549.4kv0.9.52026-11-10 11:46 UTC
keras
keras-team·Python
面向人类友好的深度学习 API,用 Python 编写,可跑在 TensorFlow、JAX、PyTorch 上,帮开发者快速搭建和训练神经网络。
深度学习+4训练框架
64421+520kv3.15.12026-11-10 11:13 UTC
langextract
google·Python
用 LLM 从非结构化文本中抽取结构化信息,并给出精确的原文出处定位和交互式可视化,方便核对抽取结果。
信息抽取+4训练框架
39298+242.8kv1.7.22026-11-10 01:39 UTC