必须带 --recurse-submodules 克隆,否则要手动 git submodule update --init --recursive;需把 avod 和 wavedata 加入 PYTHONPATH 并编译 integral image 库与 protobuf;训练前要自行下载 KITTI 数据到 ~/Kitti/object 及划分文件和 planes 文件夹
avod
kujasonMIT更新放缓面向自动驾驶场景的 3D 目标检测开源实现,基于深度学习的点云与图像融合方法,可用于训练和评测车辆、行人等目标的立体检测模型。
Code for 3D object detection for autonomous driving
暂无版本960star347fork同步于 2026-11-07 07:30 UTC
git clone [email protected]:kujason/avod.git --recurse-submodules
cd avod && pip3 install -r requirements.txt && pip3 install tensorflow-gpu==1.3.0
sh scripts/install/build_integral_image_lib.bash && sh avod/protos/run_protoc.sh 硬件要求按 README 说明
README 未给出显存要求;训练实测 Titan Xp 约 16 小时、GTX 1080 约 20 小时,默认使用 GPU 1,需 CUDA 环境装 tensorflow-gpu
AVOD 官方 Python 实现,用视图聚合做自动驾驶 3D 目标检测
面向自动驾驶场景的 3D 目标检测开源实现,基于深度学习的点云与图像融合方法,可用于训练和评测车辆、行人等目标的立体检测模型。
核心能力
- 融合图像与 LiDAR BEV 视图生成 3D 候选框
- 提供 AVOD 与 AVOD-FPN 两种检测配置
- 含 KITTI 训练、评估、推理完整脚本
- 评估时自动跑 KITTI 原生 AP 计算
- 支持多进程并行生成 RPN 小批量数据
容易踩的坑
内容由模型根据 README 生成,可能不完整或不准确,以官方文档为准。看原文 README
暂无 release 数据(可能没有发版,或尚未同步)。
用户点评
登录用户的真实使用记录,可按版本和硬件筛选共 0 条
还没有人点评。第一个说出真实体验的人最有价值。
Aggregate View Object Detection

This repository contains the public release of the Python implementation of our Aggregate View Object Detection (AVOD) network for 3D object detection.
Joint 3D Proposal Generation and Object Detection from View Aggregation
Jason Ku, Melissa Mozifian, Jungwook Lee, Ali Harakeh, Steven L. Waslander
If you use this code, please cite our paper:
@article{ku2018joint,
  title={Joint 3D Proposal Generation and Object Detection from View Aggregation},
  author={Ku, Jason and Mozifian, Melissa and Lee, Jungwook and Harakeh, Ali and Waslander, Steven},
  journal={IROS},
  year={2018}
}
Videos
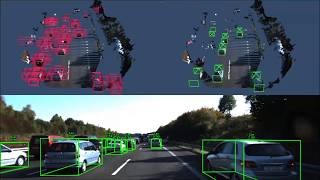
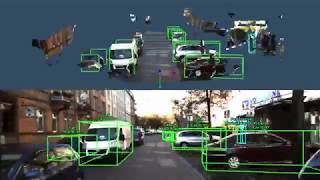
These videos show detections on several KITTI sequences and our own data in snowy and night driving conditions (with no additional training data).
AVOD Detections
AVOD-FPN Detections
KITTI Object Detection Results (3D and BEV)
| AP-3D | AP-BEV | ||||||||
|---|---|---|---|---|---|---|---|---|---|
| Method | Runtime | Easy | Moderate | Hard | Easy | Moderate | Hard | ||
| Car | |||||||||
| MV3D | 0.36 | 71.09 | 62.35 | 55.12 | 86.02 | 76.90 | 68.49 | ||
| VoxelNet | 0.23 | 77.47 | 65.11 | 57.73 | 89.35 | 79.26 | 77.39 | ||
| F-PointNet | 0.17 | 81.20 | 70.39 | 62.19 | 88.70 | 84.00 | 75.33 | ||
| AVOD | 0.08 | 73.59 | 65.78 | 58.38 | 86.80 | 85.44 | 77.73 | ||
| AVOD-FPN | 0.10 | 81.94 | 71.88 | 66.38 | 88.53 | 83.79 | 77.90 | ||
| Pedestrian | |||||||||
| VoxelNet | 0.23 | 39.48 | 33.69 | 31.51 | 46.13 | 40.74 | 38.11 | ||
| F-PointNet | 0.17 | 51.21 | 44.89 | 40.23 | 58.09 | 50.22 | 47.20 | ||
| AVOD | 0.08 | 38.28 | 31.51 | 26.98 | 42.52 | 35.24 | 33.97 | ||
| AVOD-FPN | 0.10 | 50.80 | 42.81 | 40.88 | 58.75 | 51.05 | 47.54 | ||
| Cyclist | |||||||||
| VoxelNet | 0.23 | 61.22 | 48.36 | 44.37 | 66.70 | 54.76 | 50.55 | ||
| F-PointNet | 0.17 | 71.96 | 56.77 | 50.39 | 75.38 | 61.96 | 54.68 | ||
| AVOD | 0.08 | 60.11 | 44.90 | 38.80 | 63.66 | 47.74 | 46.55 | ||
| AVOD-FPN | 0.10 | 64.00 | 52.18 | 46.61 | 68.09 | 57.48 | 50.77 |
Table: Comparison of results with other published methods on the KITTI 3D Object and BEV benchmarks (accessed Apr 11, 2018).
Additional Links
AVOD-SSD
There is a single stage version of AVOD available here
Average Heading Similarity (AHS) Native Evaluation
See here for more information on the modified KITTI native evaluation script.
Getting Started
Implemented and tested on Ubuntu 16.04 with Python 3.5 and Tensorflow 1.3.0.
- Clone this repo
git clone [email protected]:kujason/avod.git --recurse-submodules
If you forget to clone the wavedata submodule:
git submodule update --init --recursive
- Install Python dependencies
cd avod
pip3 install -r requirements.txt
pip3 install tensorflow-gpu==1.3.0
- Add
avod (top level)andwavedatato your PYTHONPATH
# For virtualenvwrapper users
add2virtualenv .
add2virtualenv wavedata
# For nonvirtualenv users
export PYTHONPATH=$PYTHONPATH:'/path/to/avod'
export PYTHONPATH=$PYTHONPATH:'/path/to/avod/wavedata'
- Compile integral image library in wavedata
sh scripts/install/build_integral_image_lib.bash
- Avod uses Protobufs to configure model and training parameters. Before the framework can be used, the protos must be compiled (from top level avod folder):
sh avod/protos/run_protoc.sh
Alternatively, you can run the protoc command directly:
protoc avod/protos/*.proto --python_out=.
Training
Dataset
To train on the Kitti Object Detection Dataset:
- Download the data and place it in your home folder at
~/Kitti/object - Go here and download the
train.txt,val.txtandtrainval.txtsplits into~/Kitti/object. Also download theplanesfolder into~/Kitti/object/training
The folder should look something like the following:
Kitti
    object
        testing
        training
            calib
            image_2
            label_2
            planes
            velodyne
        train.txt
        val.txt
Mini-batch Generation
The training data needs to be pre-processed to generate mini-batches for the RPN. To configure the mini-batches, you can modify avod/configs/mb_preprocessing/rpn_[class].config. You also need to select the class you want to train on. Inside the scripts/preprocessing/gen_mini_batches.py select the classes to process. By default it processes the Car and People classes, where the flag process_[class] is set to True. The People class includes both Pedestrian and Cyclists. You can also generate mini-batches for a single class such as Pedestrian only.
Note: This script does parallel processing with num_[class]_children processes for faster processing. This can also be disabled inside the script by setting in_parallel to False.
cd avod
python scripts/preprocessing/gen_mini_batches.py
Once this script is done, you should now have the following folders inside avod/data:
data
    label_clusters
    mini_batches
Training Configuration
There are sample configuration files for training inside avod/configs. You can train on the example configs, or modify an existing configuration. To train a new configuration, copy a config, e.g. pyramid_cars_with_aug_example.config, rename this file to a unique experiment name and make sure the file name matches the checkpoint_name: 'pyramid_cars_with_aug_example' entry inside your config.
Run Trainer
To start training, run the following:
python avod/experiments/run_training.py --pipeline_config=avod/configs/pyramid_cars_with_aug_example.config
(Optional) Training defaults to using GPU device 1, and the train split. You can specify using the GPU device and data split as follows:
python avod/experiments/run_training.py --pipeline_config=avod/configs/pyramid_cars_with_aug_example.config --device='0' --data_split='train'
Depending on your setup, training should take approximately 16 hours with a Titan Xp, and 20 hours with a GTX 1080. If the process was interrupted, training (or evaluation) will continue from the last saved checkpoint if it exists.
Run Evaluator
To start evaluation, run the following:
python avod/experiments/run_evaluation.py --pipeline_config=avod/configs/pyramid_cars_with_aug_example.config
(Optional) With additional options:
python avod/experiments/run_evaluation.py --pipeline_config=avod/configs/pyramid_cars_with_aug_example.config --device='0' --data_split='val'
The evaluator has two main modes, you can either evaluate a single checkpoint, a list of indices of checkpoints, or repeatedly. The evaluator is designed to be run in parallel with the trainer on the same GPU, to repeatedly evaluate checkpoints. This can be configured inside the same config file (look for eval_config entry).
To view the TensorBoard summaries:
cd avod/data/outputs/pyramid_cars_with_aug_example
tensorboard --logdir logs
Note: In addition to evaluating the loss, calculating accuracies, etc, the evaluator also runs the KITTI native evaluation code on each checkpoint. Predictions are converted to KITTI format and the AP is calculated for every checkpoint. The results are saved inside scripts/offline_eval/results/pyramid_cars_with_aug_example_results_0.1.txt where 0.1 is the score threshold. IoUs are set to (0.7, 0.5, 0.5)
Run Inference
To run inference on the val split, run the following script:
python avod/experiments/run_inference.py --checkpoint_name='pyramid_cars_with_aug_example' --data_split='val' --ckpt_indices=120 --device='1'
The ckpt_indices here indicates the indices of the checkpoint in the list. If the checkpoint_interval inside your config is 1000, to evaluate checkpoints 116000 and 120000, the indices should be --ckpt_indices=116 120. You can also just set this to -1 to evaluate the last checkpoint.
Viewing Results
All results should be saved in avod/data/outputs. Here you should see proposals_and_scores and final_predictions_and_scores results. To visualize these results, you can run demos/show_predictions_2d.py. The script needs to be configured to your specific experiments. The scripts/offline_eval/plot_ap.py will plot the AP vs. step, and print the 5 highest performing checkpoints for each evaluation metric at the moderate difficulty.
LICENSE
Copyright (c) 2018 Jason Ku, Melissa Mozifian, Ali Harakeh, Steven L. Waslander
Permission is hereby granted, free of charge, to any person obtaining a copy of this software and associated documentation files (the "Software"), to deal in the Software without restriction, including without limitation the rights to use, copy, modify, merge, publish, distribute, sublicense, and/or sell copies of the Software, and to permit persons to whom the Software is furnished to do so, subject to the following conditions:
The above copyright notice and this permission notice shall be included in all copies or substantial portions of the Software.
THE SOFTWARE IS PROVIDED "AS IS", WITHOUT WARRANTY OF ANY KIND, EXPRESS OR IMPLIED, INCLUDING BUT NOT LIMITED TO THE WARRANTIES OF MERCHANTABILITY, FITNESS FOR A PARTICULAR PURPOSE AND NONINFRINGEMENT. IN NO EVENT SHALL THE AUTHORS OR COPYRIGHT HOLDERS BE LIABLE FOR ANY CLAIM, DAMAGES OR OTHER LIABILITY, WHETHER IN AN ACTION OF CONTRACT, TORT OR OTHERWISE, ARISING FROM, OUT OF OR IN CONNECTION WITH THE SOFTWARE OR THE USE OR OTHER DEALINGS IN THE SOFTWARE.

ultralytics
ultralytics·Python
YOLO 系列官方实现库,一套 PyTorch 代码覆盖目标检测、实例与语义分割、图像分类、姿态估计和目标跟踪,训练到部署全流程打通。
目标检测+4检测 / 分割
63281+9812kv8.4.2082026-11-10 15:51 UTC

yolov5
ultralytics·Python
基于 PyTorch 的目标检测全家桶,覆盖训练、推理、实例分割、图像分类和模型导出,开箱即用,适合快速落地视觉任务。
目标检测+4检测 / 分割
58260+717kv7.02026-11-07 16:59 UTC
pytorch-image-models
huggingface·Python
收录最全的 PyTorch 图像骨干网络合集,涵盖 ResNet、ViT、ConvNeXt 等主流模型,自带训练、评估、推理和导出脚本及预训练权重,省去自己搭网络和找权重的麻烦。
图像分类+4检测 / 分割
37273+85.2kv1.0.312026-11-07 23:22 UTC

detectron2
facebookresearch·Python
Detectron2 是 Facebook 开源的目标检测与分割平台,提供模块化架构和丰富预训练模型,方便快速搭建和训练视觉识别任务。
目标检测+4检测 / 分割
34981+67.9kv0.62026-10-27 09:21 UTC